
Adding files to project
The previous chapter of the help described how to create a new project.In this chapter, you will learn how to add files to a project.
After you have created an empty project, you add source files to project.If you already have these files created, use "Add files to project" command under "Project" menu.To create a new files, click "New" command under "File" menu:
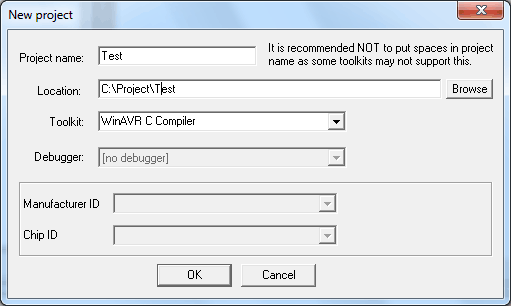
Specify a type of the file, its name and location. In our example it will be C Source File named "test" and located in the same directory where the project is located. If you do not specify an extension for the file, a default extension is added based on the type of file being created. For example, if a C Source File is being created, the extension .C is added to the filename.
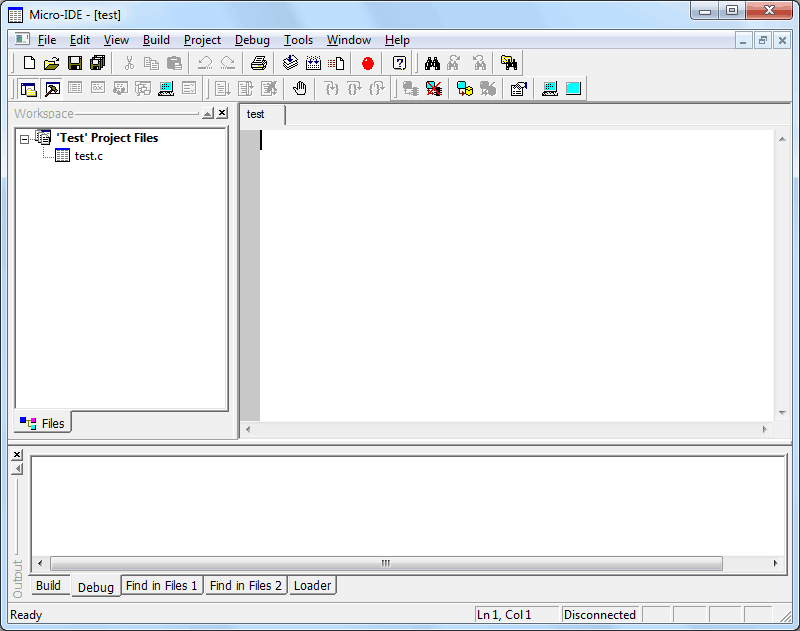
After you selected file's properties, click OK.This will create a new file, open it in editor and add file to the project.You will see it in the "Workspace" view:
If you need more than one file in project, create them in the same way.
The next section of the help describes how you can configure your project before building the project..
The previous chapter of the help described how to create a new project.In this chapter, you will learn how to add files to a project.
After you have created an empty project, you add source files to project.If you already have these files created, use "Add files to project" command under "Project" menu.To create a new files, click "New" command under "File" menu:
Specify a type of the file, its name and location. In our example it will be C Source File named "test" and located in the same directory where the project is located. If you do not specify an extension for the file, a default extension is added based on the type of file being created. For example, if a C Source File is being created, the extension .C is added to the filename.
After you selected file's properties, click OK.This will create a new file, open it in editor and add file to the project.You will see it in the "Workspace" view:
If you need more than one file in project, create them in the same way.
The next section of the help describes how you can configure your project before building the project..